Juxtaposition diagrams
Wednesday, February 24, 2010
Monday, February 22, 2010
Thesis: Diagrams: Models
Gummy bear diagrams. Courtesy of George.
Saturday, February 20, 2010
Two Fold: ACSA Conference
Our poster of Two-Fold was selected to be shown at the 94th Annual ACSA Conference representing Design Research in the Studio Context. ASCA Website
Monday, February 15, 2010
Architectural Photography: Metering
I wanted to capture all zones 0-10.
0= sky
10= dark alcove
0= sky
10= dark alcove
Zones 0 to 10
I wanted to capture the detail of the entire scene, so I used a high f-stop (smaller diameter) to do so.
0= sky and high light on concrete
10= alcove
I wanted to capture the detail of the entire scene, so I used a high f-stop (smaller diameter) to do so.
0= sky and high light on concrete
10= alcove
I wanted to capture Zones 0-10.
I'm not sure if this means that I actually did capture the blackest black and the whitest white. There is no absolute white or black in the photo, which I took as a good thing because the high and low ends of the photo are not burned out. But when using the zone system do I need to have these values in the photo?
0= sky and facade
10= lower right and flag poles
Sunday, February 14, 2010
Thesis: Model: Process: Streets
Progress of my 1"=100' site model of Boston's Freedom Trail.
I scored the sidewalks, and cut the streets out on the laser cutter. Each of the 8 pieces took about 16 minutes to cut on the laser cutter.
I scored the sidewalks, and cut the streets out on the laser cutter. Each of the 8 pieces took about 16 minutes to cut on the laser cutter.
Some pieces of the model. Each piece is 24x33.
More pieces before assembly.
Pinned up version of site and site analysis. These photos were taken on my phone. I will take better photos to show the detail of the model later. I marked the sites on the Freedom Trail, T-Stations, and the specific sites on the Freedom Trail that I want to renovate.
Labels:
diagrams,
freedom trail,
laser cutter,
models,
site,
thesis
Tuesday, February 9, 2010
Wednesday, February 3, 2010
Thesis: User Groups: More Diagrams
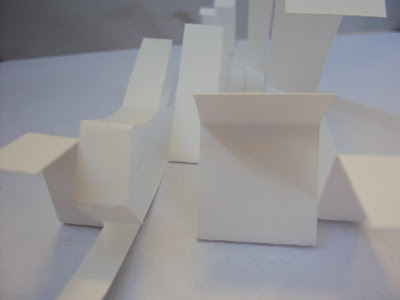
This diagram indicates how I want to lift the Freedom Trail up to create seating spaces, and shelter, as well as "bend/ fold" the trail into the ground to excavate usable program space.
Thesis: Site: History
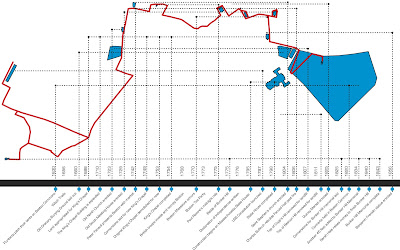
Above is a diagram showing the time-line of what occured on the Freedom Trail in relation to the physical Freedom Trail path.
Monday, February 1, 2010
Photography: Pinhole Camera
These are images from my attempt at Pinhole photography. The camera was constructed using this method: Pinhole Camera Instructions. They look pretty odd; over and under exposed, but it is a very interesting method of photography. Not sure if I will ever do it again, but it was an interesting experience.
My friend Jill and I tried using this method at first: YouTube Link. We found that this method was very difficult to construct... the video was very simple to follow but once created the film kept popping out of the holders, and all of the film was over or under exposed. Jill and I think that this was because of the tape we used. We added layer after layer of tape, yet we did not use electrical tape. When we created the match box camera, we used electrical tape, which I feel helped keep more light out.
Here are the photos......
15 second exposure
20 second exposure
45 second exposure
15 second exposure
20 second exposure
30 second exposure
10 second exposure
10 second exposure
10 second exposure
10 second exposure
5 second exposure
Subscribe to:
Comments (Atom)


